How to fill in, sign, and protect a PDF

Last updated: 2026-11-09

A lot of paperwork still arrives as a PDF form. This guide fills in a one-page form, signs it, dates it, and then looks at the ways to protect a PDF before you send it.

Here are some real-world examples:

  • A parent fills in a field trip permission slip and signs it with a finger on a phone.
  • A tenant signs a lease renewal and sends it back to the landlord the same day.
  • A volunteer completes a sign-up form for a beach cleanup.
  • A new employee fills in a direct deposit form, then adds a password before emailing it.

PDF Editor runs in your browser. A PDF from your computer is opened and edited there. It isn't uploaded to a PDF Editor server, and you don't need to sign in. The form in this guide is an illustrative PDF made for these guides, and it collects nothing. Select any picture to see it at full size.

Fill in the form

If a PDF has form fields, you can type straight into them.

  1. Open PDF Editor and open the form.
  2. Click a text field and type. Press Tab to move to the next field.
  3. Click a checkbox to check it, and click again to clear it.

Your entries are saved in the PDF with the rest of the form. Some PDFs only look like forms, with printed lines and no fields behind them. To fill one in, select Add text in the Annotate panel and click where each answer goes.

A few forms are built with an older format called XFA. PDF Editor can't fill them in, and some open to a page that asks for Adobe Reader. Form scripts, such as a button that adds up a column, don't run.
Add your signature

  1. Select Sign in the toolbar, or choose Tools > Signature....
  2. Select Draw, Type, or Upload. Draw lets you sign with a mouse, a finger, or a stylus. Type writes your name in a script font. Upload takes a picture or scan of your signature. Use a dark signature on light paper, and PDF Editor keeps the ink and leaves the paper out.
  3. To reuse the signature next time, check Save signature on this device. It stays in this browser on this device.
  4. Select Add. The signature lands on the current page, selected.
  5. Drag a corner to make it smaller or larger, then drag the signature onto the signature line.
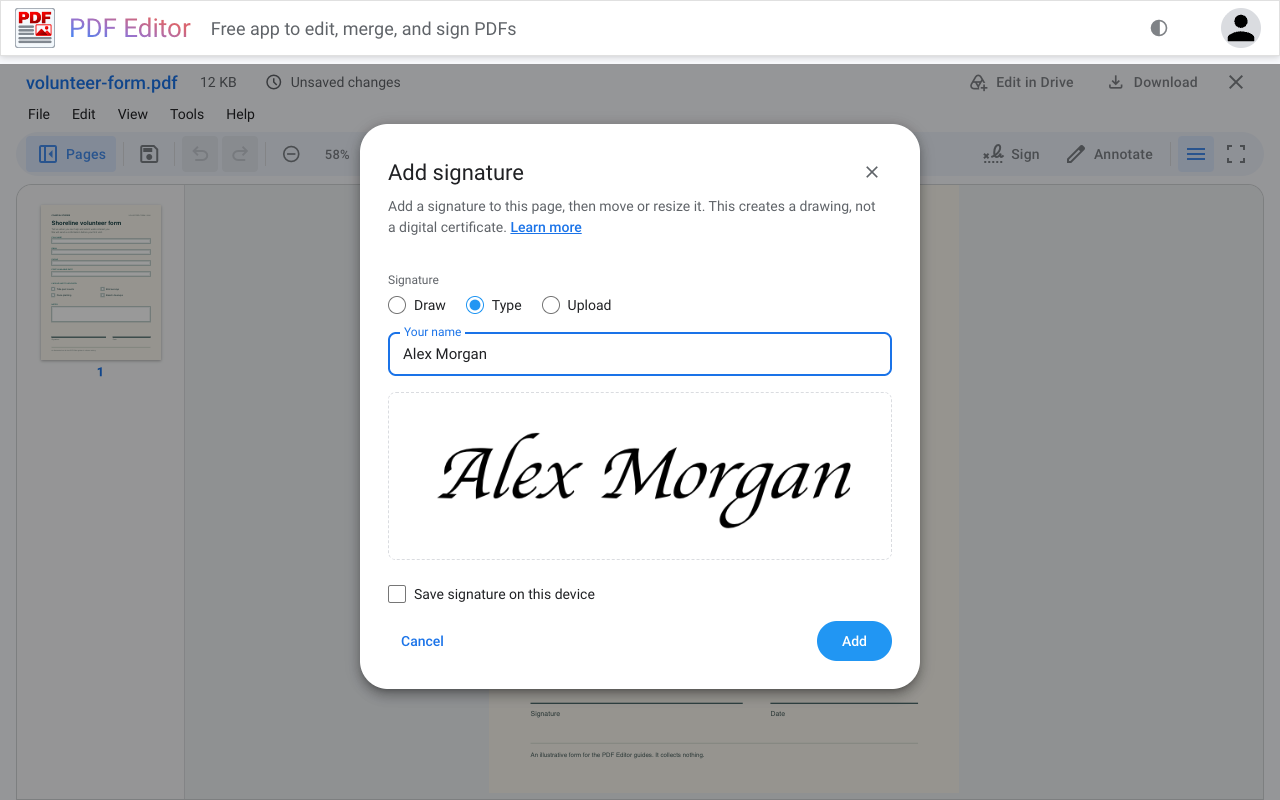
The Add signature dialog with Type selected and the name Alex Morgan shown in a script font.
Add signature. Type is selected, and the preview shows the name in a script font. Save signature on this device is off.

Add the date

The date line beside the signature has no field behind it, so the date goes on as a text note.
  1. Select Annotate, then Add text.
  2. Click just above the date line and type the date.
  3. Press Esc when you're done.
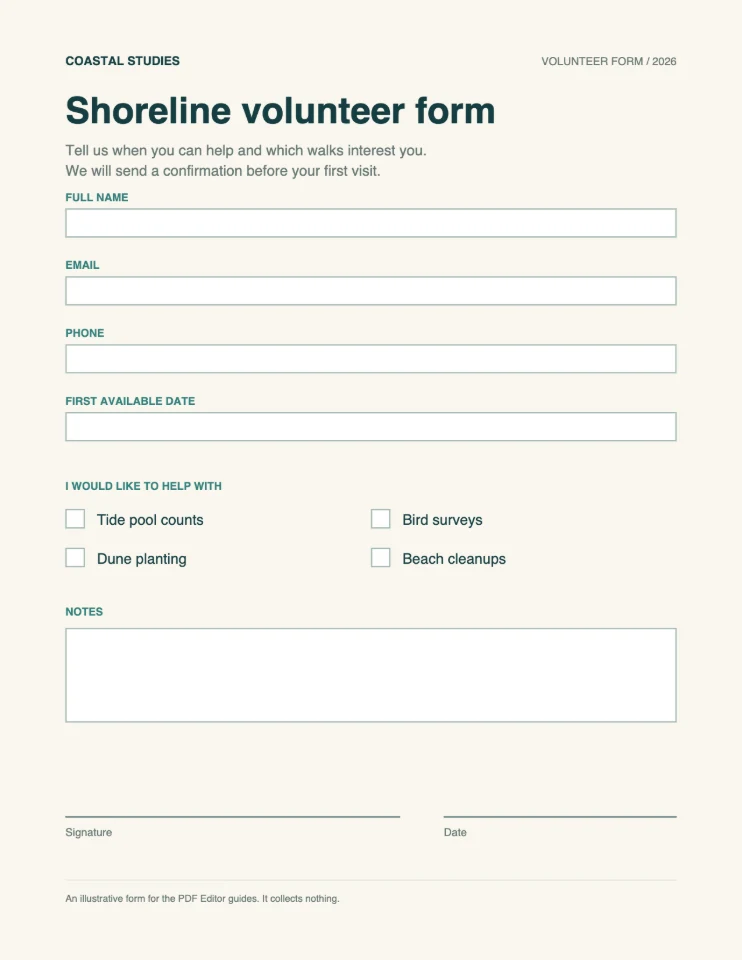
An empty volunteer form with name, email, phone, and date fields, four checkboxes, a notes box, and signature and date lines.
Before: Empty form Four text fields, four checkboxes, a notes box, and printed lines for the signature and the date.
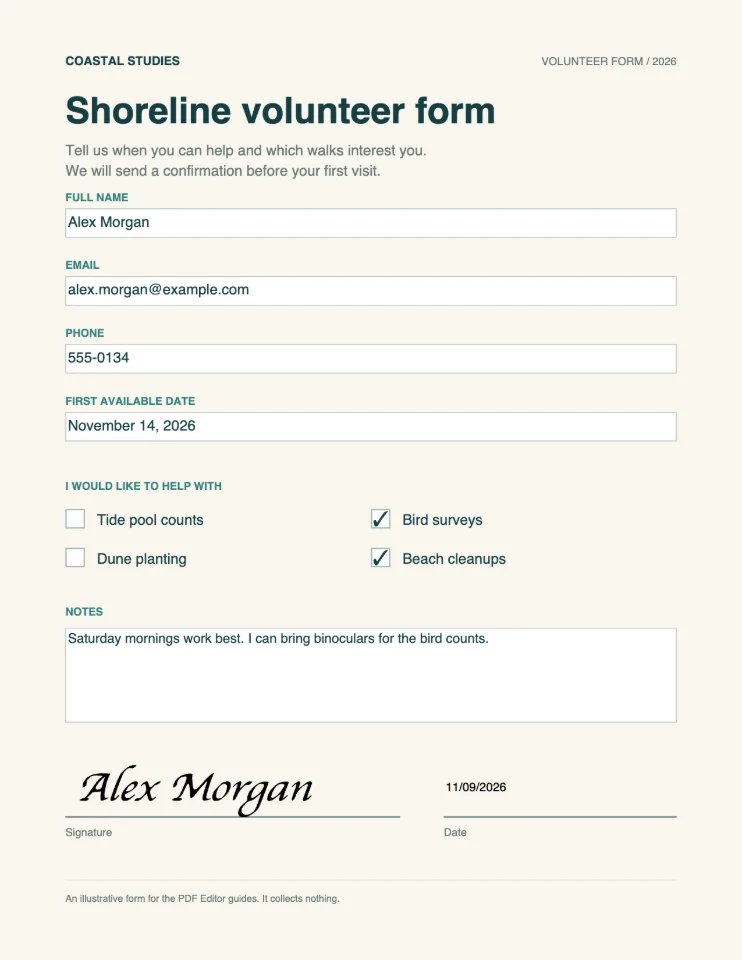
The same form filled in for Alex Morgan, with Bird surveys and Beach cleanups checked, a script signature on the signature line, and 11/09/2026 above the date line.
After: Filled in, signed, and dated The fields are filled in, two boxes are checked, the typed signature sits on the line, and the date is a text note.

A signature made this way is a picture of your signature, the same as signing a printout and scanning it. It is not a digital certificate. Most everyday forms only need the picture. A few contracts and government forms ask for a certificate-based digital signature, which needs a different tool.

Lock the answers in

Form fields stay editable after you save, so anyone with a PDF editor could change the answers. To make the answers part of the page, right-click below the thumbnails in the Pages sidebar and choose Whole document > Flatten form fields. The same command is in Page actions when a page is selected. The answers stay on the page as they look now, and the fields can no longer be filled in.

Flatten when the form is finished. Undo takes it back while you are still editing.

Protect the PDF with a password

If a form holds personal details, add a password before you email it. Choose Tools > Protect with password.... There are two kinds:
  • Password to open. Nobody can view the PDF without it. Send the password separately, such as in a text message. Never put it in the same email as the PDF.
  • Permissions password. The PDF opens without a password, but the boxes under Allow limit printing, copying, editing, filling in forms, and commenting. The permissions password lifts those limits.
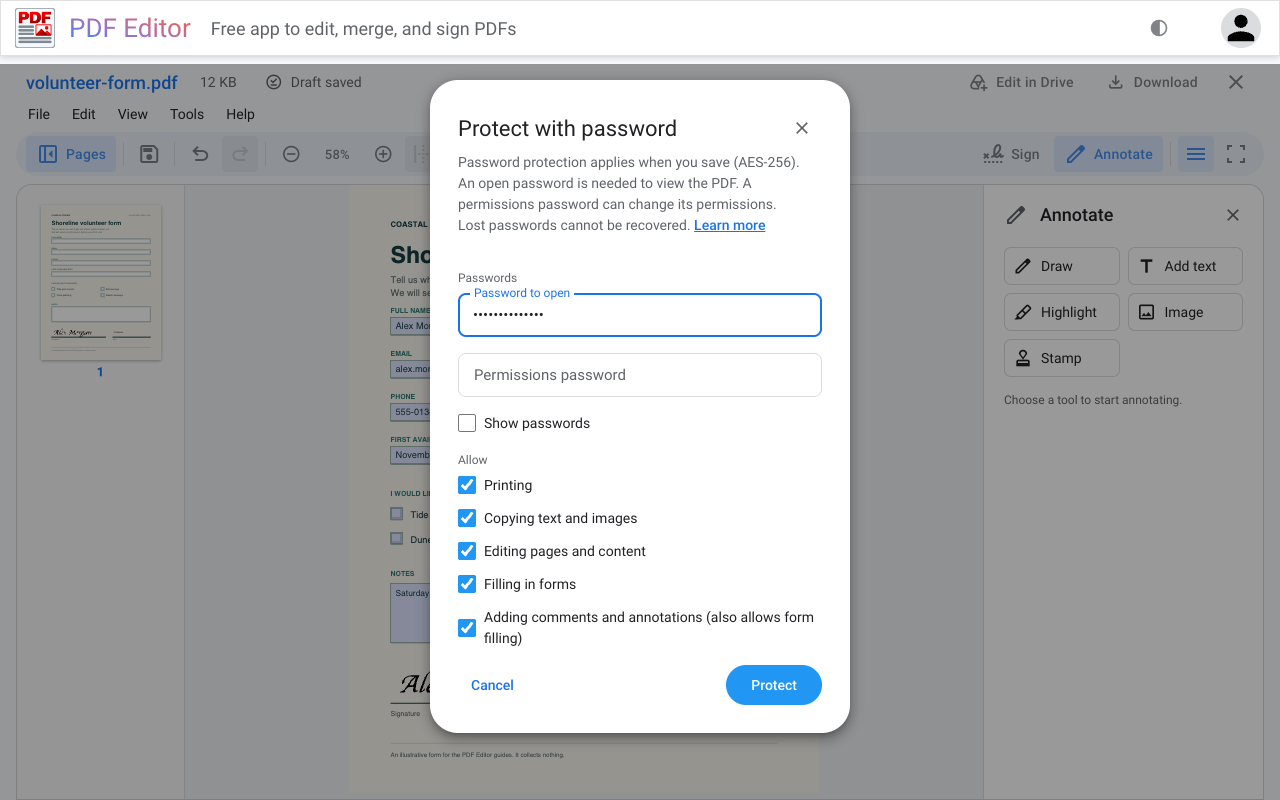
The Protect with password dialog with a password to open typed and every Allow option checked.
Protect with password. A password to open is typed. Select Show passwords to check it. Everything under Allow is checked, so anyone with the password can do anything.

Protection applies when you save, using AES-256 encryption. Lost passwords can't be recovered, so keep yours somewhere safe. To take protection off later, open the PDF with its password, choose Tools > Remove password, and save.

Some PDF readers ignore the Allow settings. For a PDF that must stay private, use a password to open.

Save and send

  • Save writes the finished form to the file you opened. For a PDF from your computer, that takes Chrome or Edge. Safari and Firefox download a copy instead.
  • Download saves a copy, ready to attach to an email.
  • File > Properties... shows the file's details, and Tools > Metadata... changes the title and author that other apps show.

If the form came from Google Drive, Save updates the Drive file when you have edit access, and File > Share... opens Google's sharing dialog. Fill forms, annotate, and sign and Passwords and permissions in PDF Editor Help have more detail.

The volunteer form is an illustrative PDF made for these guides. It collects nothing, and the name and details in the example are made up. Every screenshot was taken in PDF Editor. The page images were saved with File > Export > Pages as images... at Print (150 dpi) and reduced in size for this page.